Step 1: Create Campaign
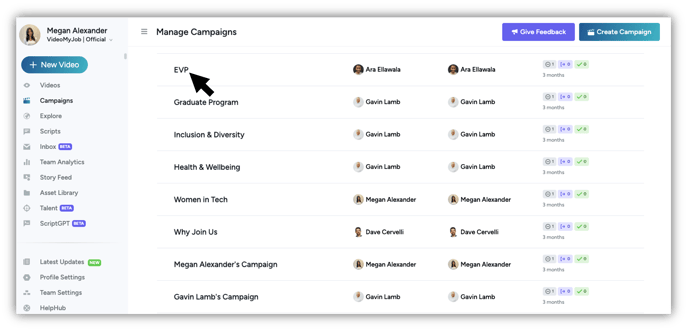
- Start in your VideoMyJob dashboard and click on "Campaigns" in your side menu. This will give you access to all the campaigns that has been created in your account. Use the "Filter" or "Search" to find a campaign you've already created from the list.
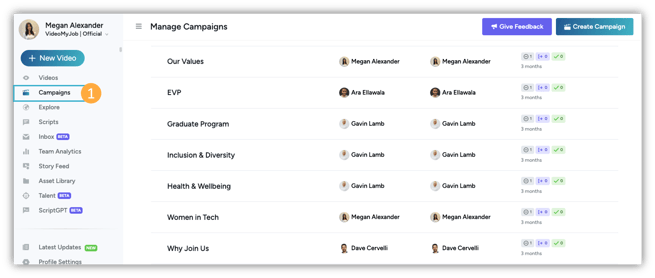
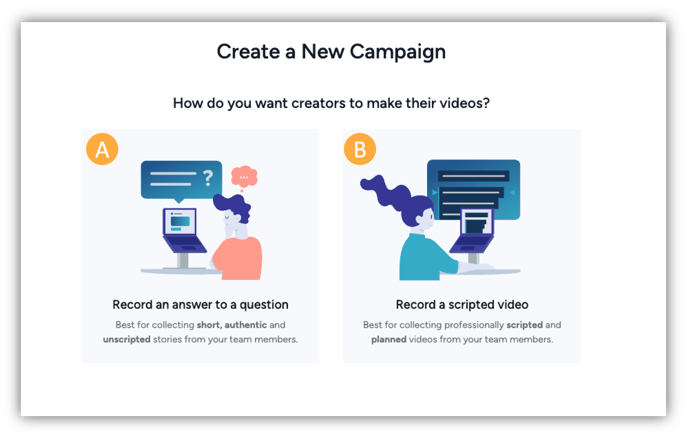
- To create a new Campaign click on "+New Video" and "Create Campaign" OR select the "Create Campaign" in the top right corner. Both options will prompt you to choose how you would like to collect your campaign videos;

- Ask the creator to "Record an answer to a question" - best for collecting short, authentic and unscripted stories from your team members
- Ask the creator to "Record a scripted video" - best for collecting professionally scripted and planned video from your team team members
- With your campaign objectives in mind, think about any questions that your candidates might have, and the unique perspectives you want your team to share on video. This will guide the questions or scripts you provide. Follow the below guidelines to help;
- Choose Question: You will have three options in this category. You can either;
- Start From Scratch: Select the "Write a new Question" button and start typing your question/s from scratch
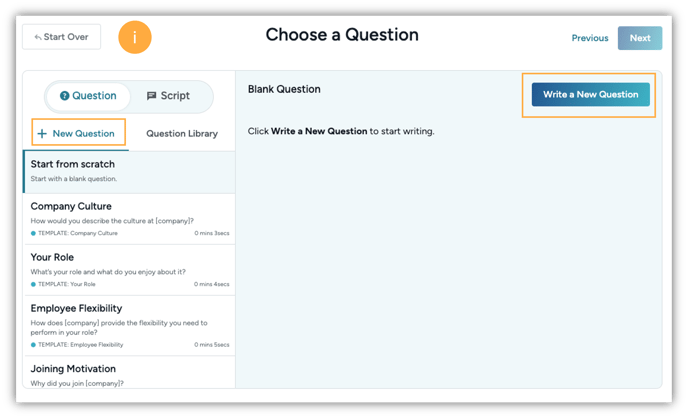
- Select from the browser list: Click on the question template you'd like to use and then select "Use This Template"
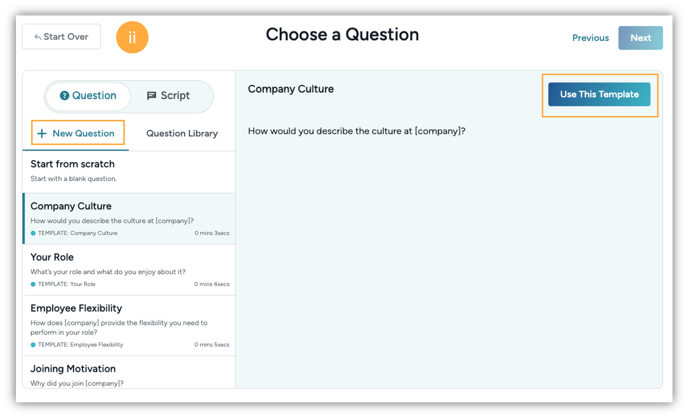
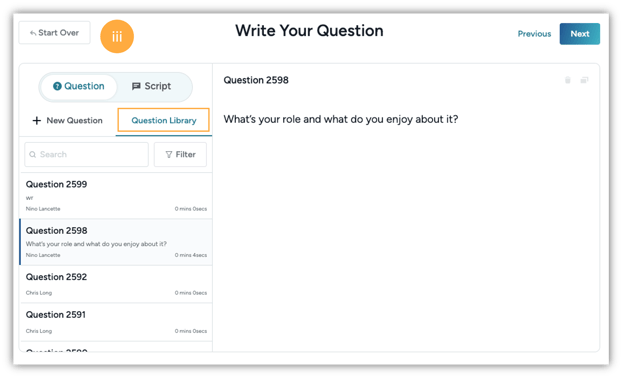
- Select from Question Library: Click on "Question Library" to browse your historical list of questions previously used in your account
- Start From Scratch: Select the "Write a new Question" button and start typing your question/s from scratch
- Choose Script: If you would like to choose to send a script instead of a question, simply select the "Script" tab which will give you the same three options where you can;
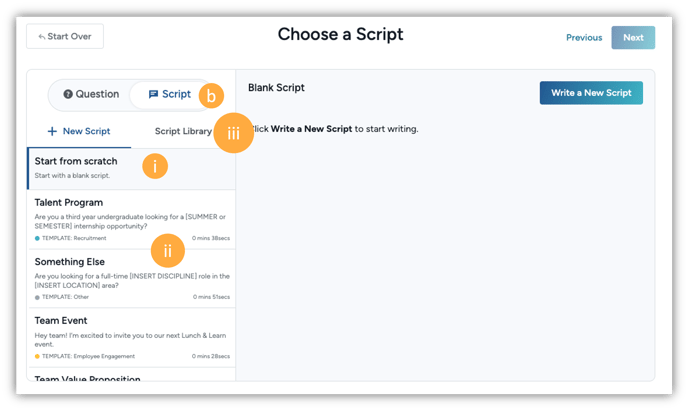
- "Start from scratch"
- Select from the list of templates
- Select from your "Script Library"
- Choose Question: You will have three options in this category. You can either;
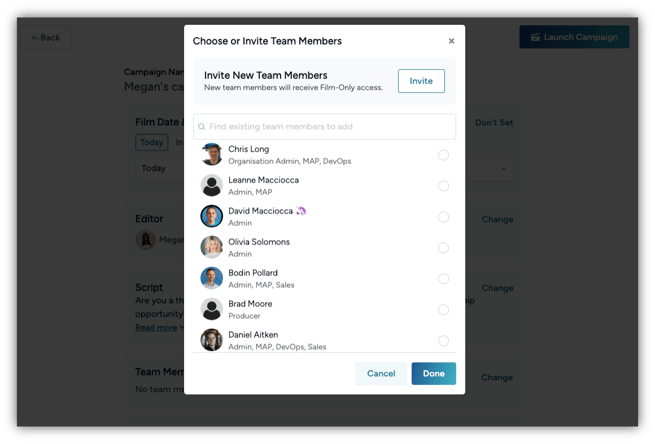
- Now you can assign the video requests to your team members by either selecting them from the list, or manually adding their contact details by selecting "Invite".
- You'll be prompted to review your Campaign details before you launch. Here you have a few options;
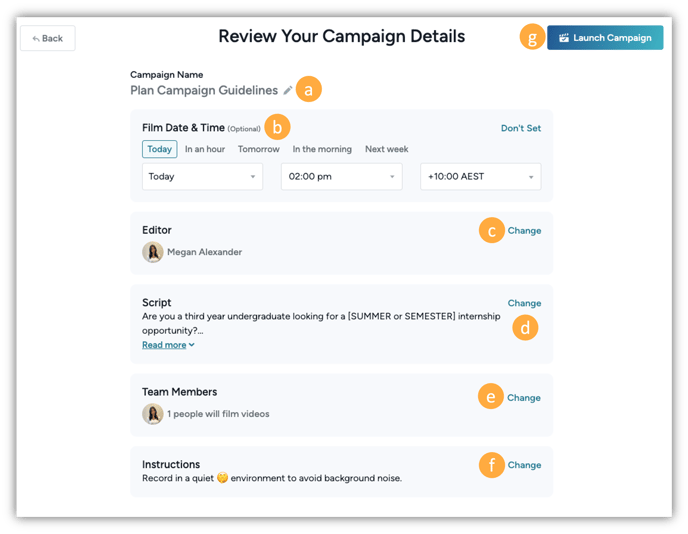
- Campaign Name: Click the edit icon to rename your campaign accordingly - having a good naming system will help you stay on track when you're managing multiple campaigns
- Film Date & Time: Use this to select a date you want the recipient to film, or use it as a due date option. You can also select "Don't set" to remove this option
- Editor: This will be the person that edits and publishes the video. This will default to you, but you can select someone else by clicking "change"
- Script / Question: You can change the question or script to something different by clicking on "change" and then following the prompts to make the changes
- Team Members: This is a list of people you are sending film requests for this campaign. Click on "change" to edit or add additional team members
- Instructions: This has a default message, but click "Change" to edit this
- Launch Campaign: once you've reviewed all the campaign details, select Launch Campaign!
Step 2: Manage Your Campaign/s
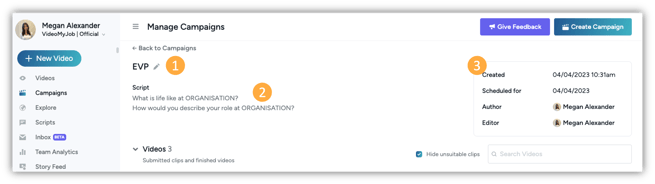
Clicking into a campaign from the Campaigns menu let's you manage everything in one place;
- Edit the name of the campaign by selecting the edit pencil icon ✎
- View the script or questions you sent to recipients
- Date and time stamp showing when this campaign was created, and who the author and editor is.
-
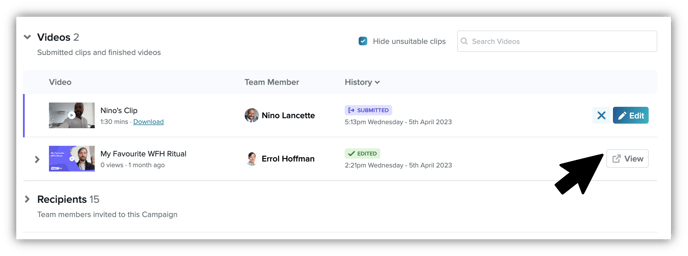
- Do basic web editing by clicking the "Edit" button.
- Click the ✖️ to mark the video "Unsuitable".
- Or select to "View" the video that has been edited and branded. You have the option to expand this section where you can locate the original clip if you need to "Edit Again" or "Download"
Note 💡: If you cant see a video in campaigns that's been submitted, check your "Inbox"... Here you'll have an option to then "Add to Campaign"
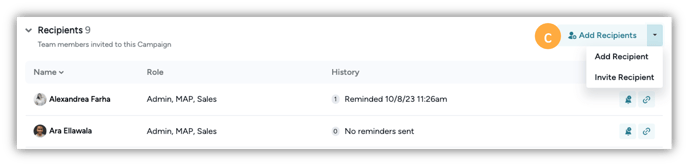
 Recipients:
provides a full list of all recipients that were sent film requests as part of this campaign. You have the option to;
-
- send reminders to anyone that has not submitted their videos and this will be sent via their email
- Or use the "Copy Link" option to directly send them a link to film their video
- Add Recipients: Use this feature to add any additional recipients that you would like to send film requests for this campaign
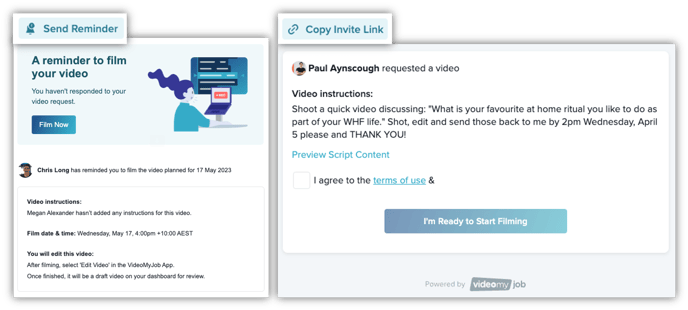
💡... Keen to know what recipients see when you "Send Reminder" or where the "Copy Invite Link" takes them?
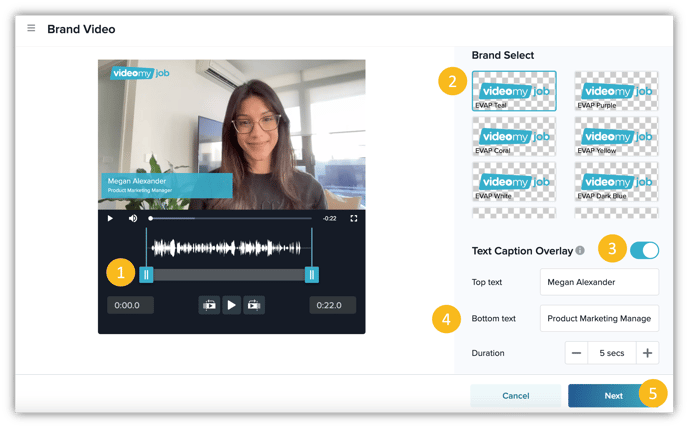
Step 3: Web Editing Pt:1
To edit videos that have been submitted for this campaign, simply click on the edit button in the videos section of your campaign and follow these steps;
- Use the trim handles to trim the video
- Select your preferred logo from the "Brand Select" options
- "Text Caption Overlay" is turned on by default, but the can be turned off using the slider
- Enter the caption text you would like to have included - this is generally the person's name and title. Then select the time duration you would like this caption to be displayed.
- When you're ready, click "Next"
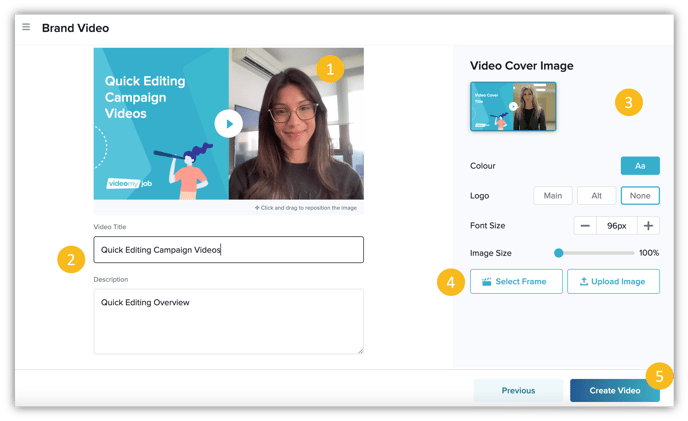
Step 4: Web Editing Pt.2
Once you've completed your "Web Editing Pt.1" and select next, follow these steps to create your video;
- Drag your image into the frame by clicking on the image and dragging it across
- Type in your "Video Title" and "Description" into the box
- The right hand side section will give you option to change the brand colour, the prominence of the logo, the font size, image size.
- "Select Frame" let's you choose a different frame to use as the cover image, or select "Upload Image" to choose a image from your gallery or desktop.
- When you're ready , click "Create Video"
Note: Web Editing is limited to basic editing and branding options. To access Advanced Editing features, please use the App.
Step 5: Publish and Share
Once the videos from your campaign has been submitted, edited and branded... you’re ready to publish on social media, download to share or switch on your Story Feed to easily embed your videos on your career site.
Videos that are ready to be shared will have a "View" button
- Click the "View" button
- Publish and share videos from your campaign to Social Media or Job Seek website
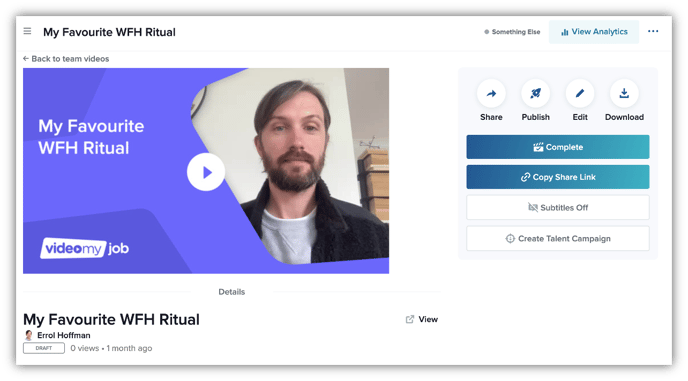
- Share the video to your Story Feed on a careers site - if you unsure how to add videos, check out the Getting Started With Story Feed article.
Note 💡: If you don't have Story Feed activated, then please speak to your Customer Success Manager about switching on your Story Feed.
Step 6: Analytics
Now that your video is published and shared, you can use our built-in analytics feature to track how your video is performing. This is a great option to help you test what videos are resonating most with your audience and optimise accordingly.
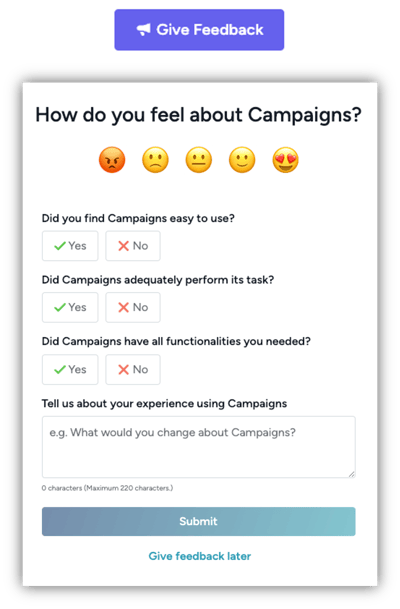
Step 7: Give Feedback
Please help us improve your user experience by clicking on the purple "Give Feedback" in the top right corner, and complete the feedback form.